Our system storage is a crucial element for maintaining the functional ability of our PC. With prolonged usage, you may dump your computer with unwanted files. These unnecessary documents can occupy more of your device’s memory, restricting the space available for program execution. Eventually, it can hinder the system’s performance to a greater extent.
Cleaning and managing the disk space on a Windows device is an essential functional tweak for recovering your system efficiency. You can explore the best methods for managing the disk space of your Windows operating system. Ensure that you back up your data before making any changes and follow step by step process to enjoy better device performance.
Let us Learn the Methods for Managing Your Disk Space on Windows.
We will be aware that free space available on your device is crucial for better system performance. Let us learn how to manage it with manual system utilities and dedicated third-party tools.
Clearing Out Duplicate Photos
The manual methods for clearing out repeated images are difficult and time-consuming, therefore we need to look at a smarter option. A duplicate photo finder tool can help you.
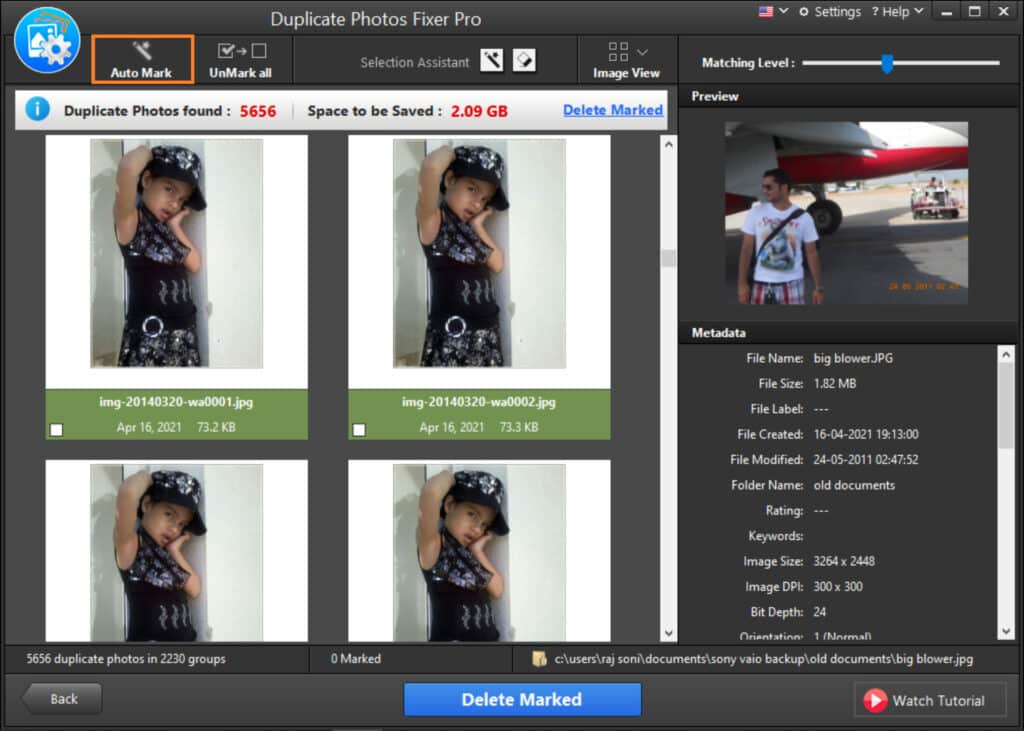
Duplicate Photos Fixer Pro is the best photo duplicate finder for erasing similar photos that are currently accessible. The program enables the deletion of any duplicate images. It has a fantastic potential to find duplicate photos and reclaim your precious disc space by eliminating needless photographs. Duplicate Picture finder can automate the process to scan, search, preview, and delete duplicate images.
Duplicate Photos Fixer Pro Features
● Ability to categorize scanned results makes the selection easier
● Better monitoring capacity
● Compatibility with several devices and operating systems
● The ability to offer a variety of scanning methodologies
● The potential to find duplicate photos in Google Drive
Disk Management Utility
A Windows utility can help you manage your disk space. Make sure to use it to enhance your hard disk-free space. The following tweaks may assist you in using this utility.
Step 1: Access the disk management utility by invoking the right context menu from the Start menu. You can also press the window key, type ‘Disk Management’ and select ‘Create and format hard disk partitions under the Control Panel app.
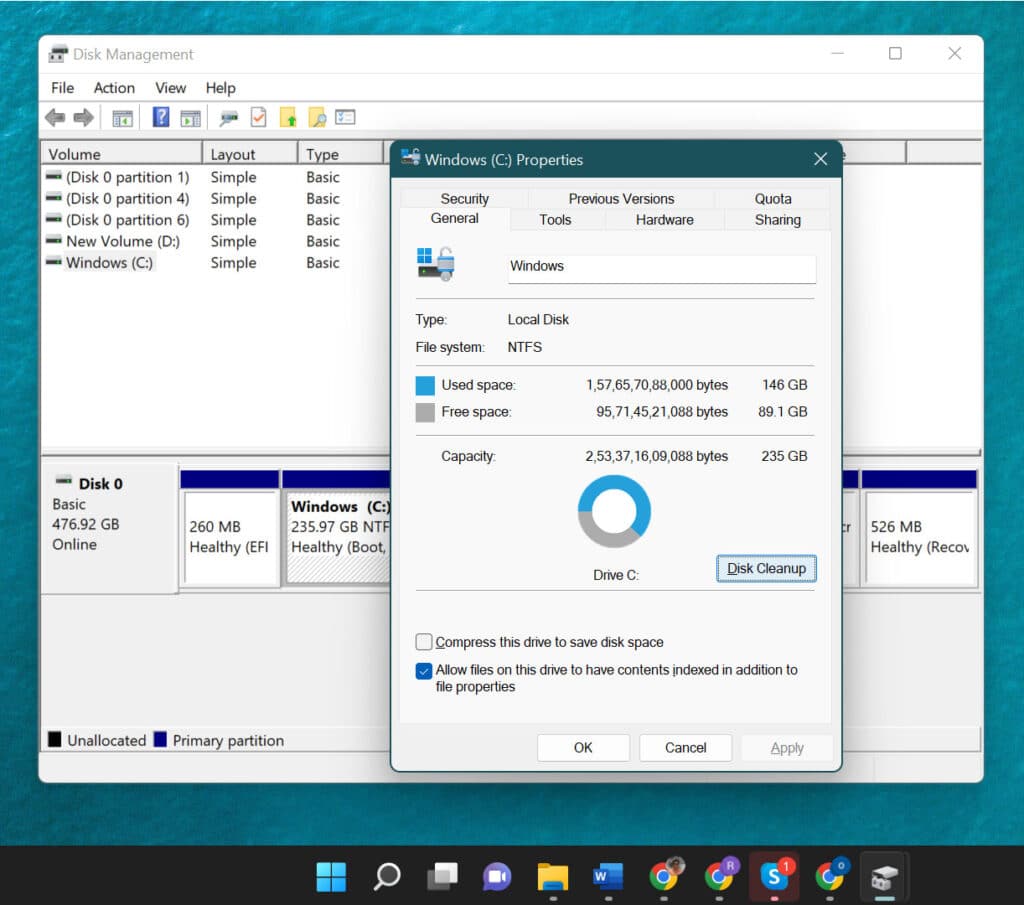
Step 2: Choose the drive that needs to be managed.
Step 3: Right-click on the drive and choose the ‘Properties’ option.
Step 4: Locate and choose the Disk Cleanup option.
Step 5: Wait for the disk cleanup utility to calculate the volume that can be cleaned.
Step 6: Choose the types of files to be deleted.
Step 7: Click “OK” to clean your drive.
Note: You clean the system files using the separate option (Clean up Windows Files) available in the disk cleanup utility.
Disk Defrag
Whenever you save a file in your Windows driver, it will be allocated some disk space. However, your system space will be cluttered with the random allocation of space for files. You can defragment it with the disk defragmentation utility.
Step 1: Access the search console from the Start menu.
Step 2: Search for ‘Disk Defrag’ in My Stuff.
Step 3: Go through the search results and select ‘Disk Defragmenter’ or ‘Defragment and Optimize Drives’ from the list.
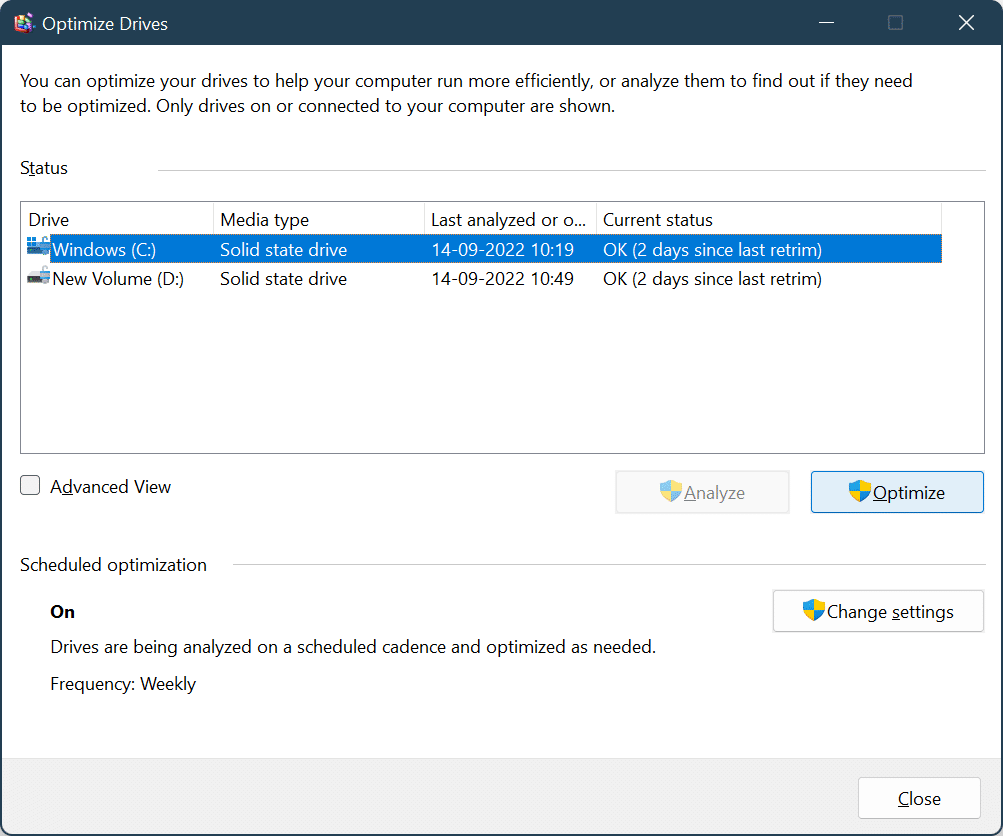
Step 4: Choose the disk that should be defragmented in the Current Status choice.
Step 5: Analyze the disk for checking whether it is to be defragmented.
Step 6: Check the analysis report and if the percentage defragmented is above 10%, then the disk needs to be defragmented.
Step 7: Select the Defragment Disk or hit the Optimize button to initiate the defragmenting sequence.
Step 8: Wait for the defragmenting sequence to complete.
Removing Old Files
Older files are of no use and can occupy more of your system space. You have to clear it out to enhance the functionality of your system.
Removing Old Download Files
Sometimes, older downloads may occupy more of your disk space. The actions listed below can help you delete old redundant downloads.
Step 1: Open the downloads directory in Windows Explorer.
Step 2: Review the listing of documents that were downloaded.
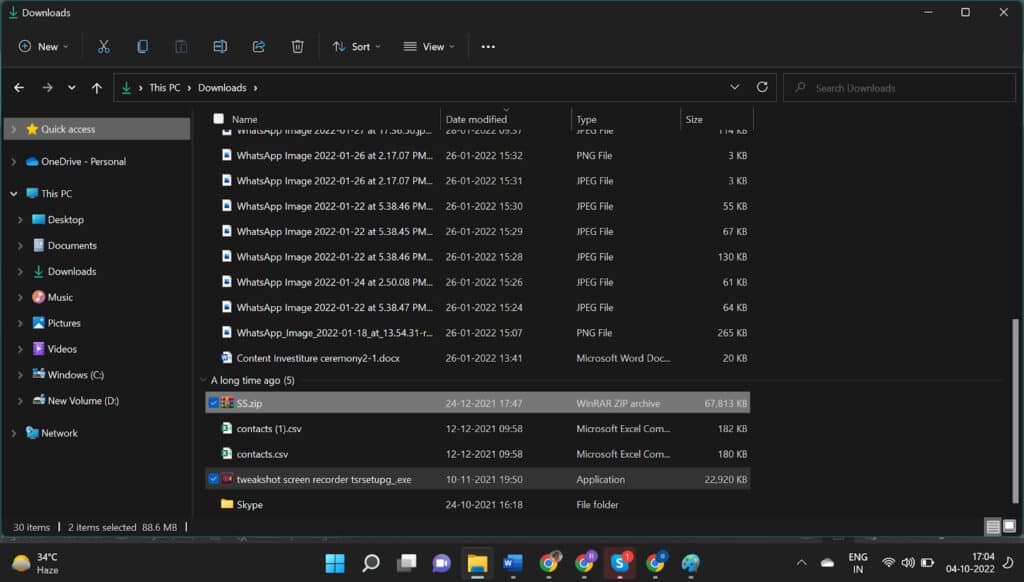
Step 3: Sort the directory’s files according to the last modified date.
Step 4: Locate and select the unwanted files and delete them.
Removing Unwanted Files
Sometimes your system memory may be filled up with files that you no longer need. Temporary files, Cache Files, Cookies, Recycle Bin Items, and many more files fall under this category. You can remove them with ease using the Storage Sense utility.
Step 1: Access the system settings by opening the menu bar.
Step 2: Choose “Storage” on the left sidebar.
Step 3: Activate and enable the toggle switch for Storage Sense.
Step 4: Select the “Run Now” or “Configure Storage Sense” option.
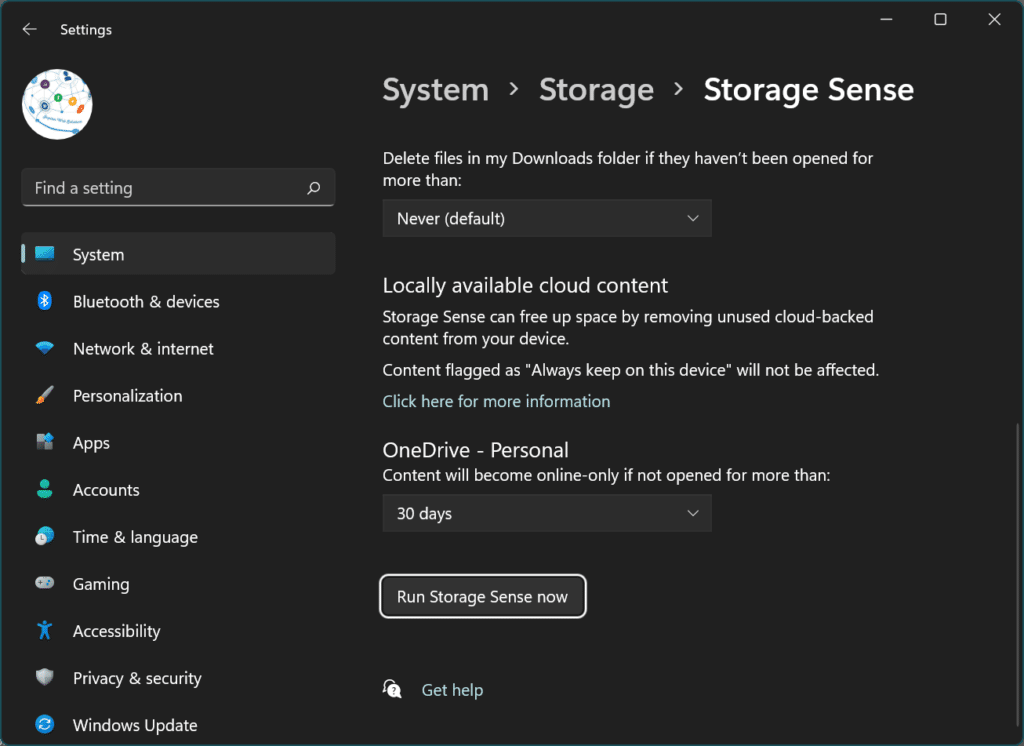
Step 5: Select the choice to delete temporary files that aren’t used from the Temporary Files menu.
Step 6: Pick a frequency from the drop-down boxes under Temporary Files. Users may choose how periodically Windows clears off the temp folder files from the downloads folder and Recycle Bin.
Step 7: To instantly delete all temp folder files, click Clean Now.
Removing Backup Files
It is safer to create a backup of your system settings and data to recover it when required. Sometimes the older backup files of Windows may occupy humongous system space resulting in system lag. Clear the past backup files with the procedure given below.
Step 1: Launch the Control Panel.
Step 2: Opt for System and Security Choice.
Step 3: Select System choice.
Step 4: Go to the left pane and choose System Protection. Windows 11 users may find this option in the Accounts tab to configure backup preferences.
Step 5: Click Configure on the System Protection tab.
Step 6: Press the option to Delete and restore files.
Step 7: Confirm your choice by clicking OK.
Summing Up
Tweaks essential for managing Windows disk space are worth exploring. Cluttered storage can eventually hinder the system’s ability. You may easily manage your disc space with the aid of this summary. All the possible reasons and the solutions for optimizing your storage space are discussed here. Use these insights to speed up your system. System memory can be reclaimed with system utility as well as a free duplicate photo finder.


